Using WiCAN with Home Assistant
WiCAN can be integrated with Home Assistant using the official integration. This guide will walk you through the setup process, both for configuring the WiCAN device and setting it up in Home Assistant. Follow these steps to make WiCAN communicate seamlessly with Home Assistant and provide real-time data from your vehicle.
Integration Device Setup
To connect WiCAN to Home Assistant, you first need to connect it to the same WiFi network as Home Assistant.
- Connect to WiCAN Access Point:
Connect to the device's access point named WiCAN_xxxxxxx. The default password is@meatpi#. It is recommended to change the password for safety reasons. - Note the mDNS Name:
In the Status tab, take note of the mDNS name. It should look something likewican_xxxxxxxxxxxx.local.xxxxxxxxxxxxis the device unique ID. - Connect WiCAN to Home WiFi:
Connect WiCAN to the same WiFi network as Home Assistant. In the WiCAN settings, change the Mode to AP+Station, and fill in your WiFi SSID and password. - Change the Protocol: Set the Protocol to AutoPid.
- Submit and Reboot:
Click on the Submit button. The device will reboot on its own. - Access WiCAN via mDNS:
Disconnect from the WiCAN access point, and using your web browser, go to the mDNS name you noted earlier, e.g.,wican_xxxxxxxxxxxx.local. - Enable Vehicle Specific Settings:
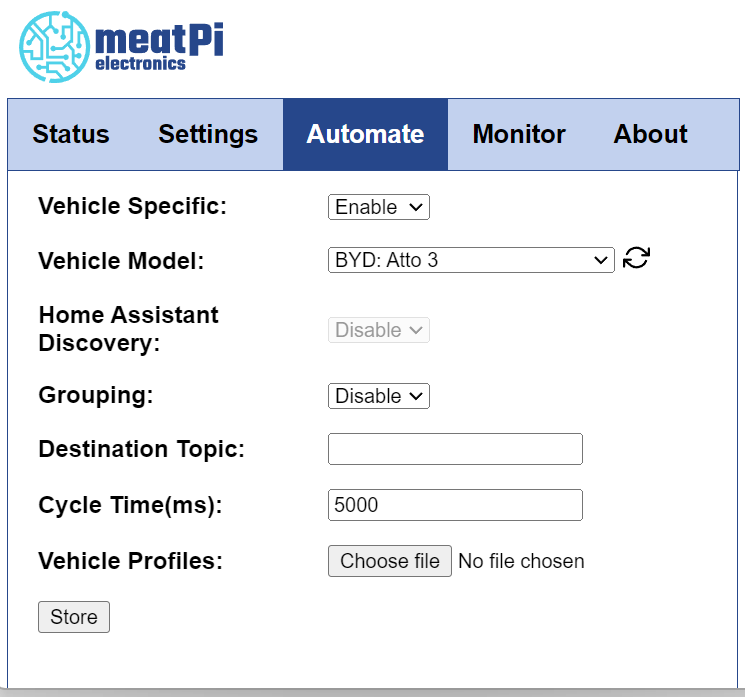
On the webpage, go to the Automate tab and enable Vehicle Specific settings. - Sync Vehicle Model:
Press the ⟳ button next to Vehicle Model to fetch supported vehicle models. - Select Vehicle Model:
Select your vehicle model from the dropdown list.
If your vehicle is an electric or hybrid model and is not yet supported, please open an issue on GitHub, and we’ll guide you through the process of adding support.
If your vehicle is not an EV or hybrid, you can try scanning for standard PIDs using the instructions here - Set Cycle Time:
Set the Cycle Time in milliseconds. This defines how often WiCAN will request parameters from the ECU. - Destination Topic (optional):
This field is only used for MQTT communication. - Store and Reboot:
Click on the Store button, then go to the About tab to reboot the device.
Integration HA Setup
The WiCAN integration is available through HACS. You can find the integration repository here.
- Install the Integration via HACS:

Add the integration repository link to HACS and install the WiCAN integration.- Follow the official guide to add a custom repository. The Repository URL is
https://github.com/jay-oswald/ha-wicanand it is anIntegration - Follow the official guide to download a repository
- Follow the official guide to add a custom repository. The Repository URL is
- Navigate to Integrations:
In Home Assistant, go to Settings > Devices & Services > Integrations. - Add WiCAN Hub:
Click on Add Integration, search for WiCAN, and select it. - Enter mDNS:
Enter the mDNS name that you noted earlier (wican_xxxxxxxxxxxx.local) to connect the WiCAN device.
After completing these steps, WiCAN will be connected to Home Assistant, and you will be able to monitor the available car parameters directly from the Home Assistant interface.
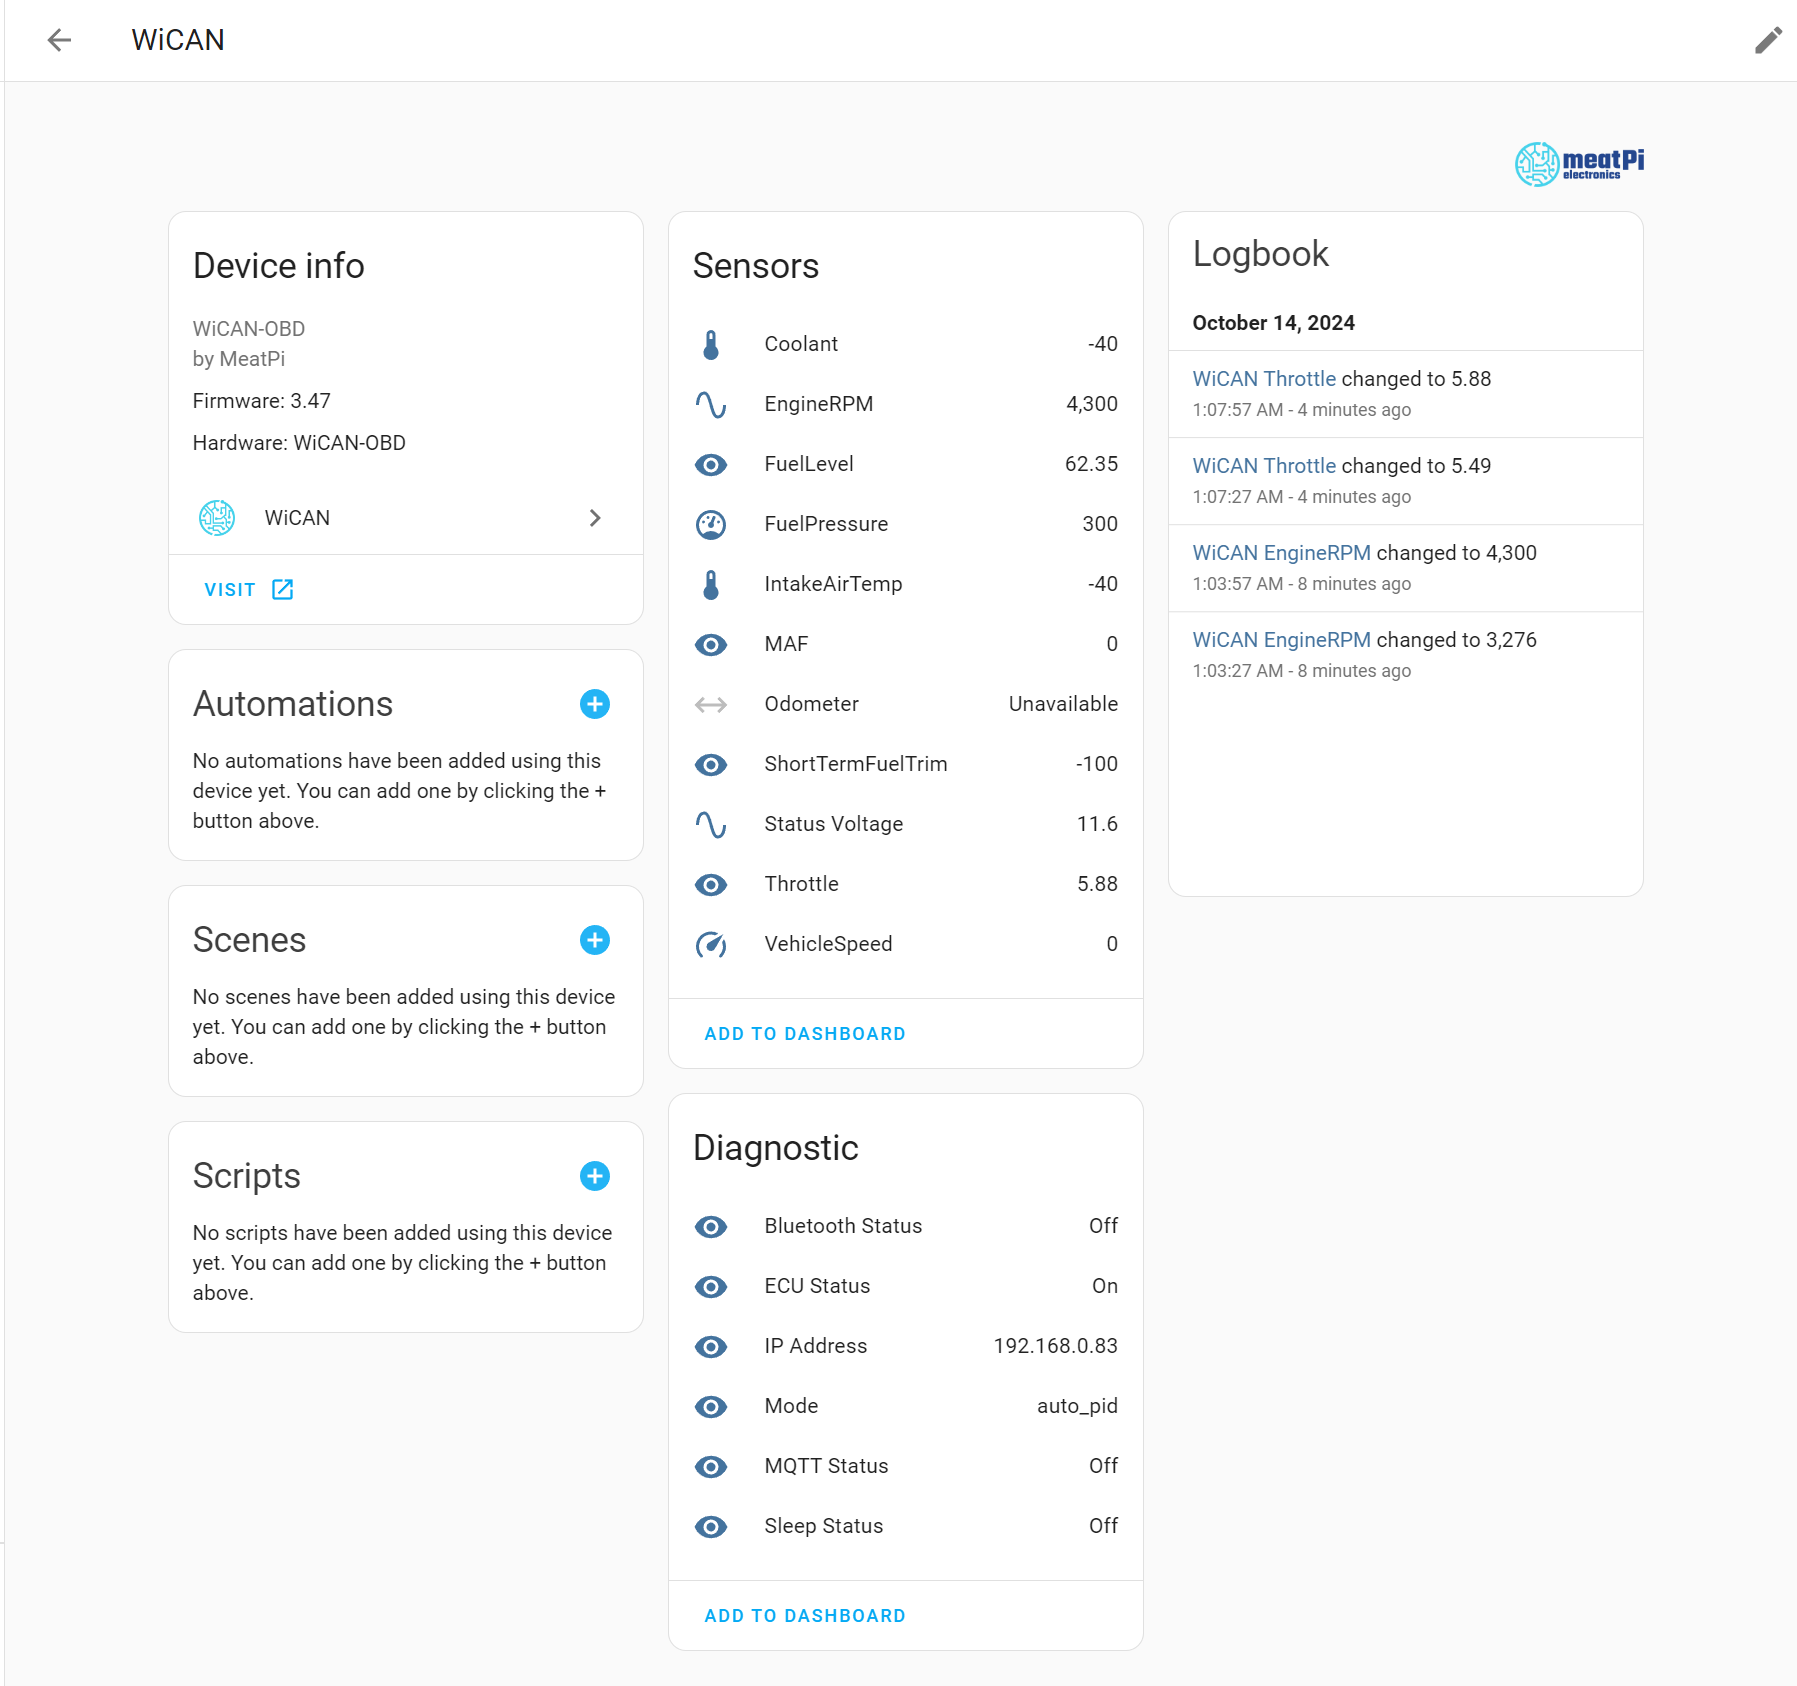
Table of Contents